Check out our new Help & Tips section on buying and renovating houses in France
Buying a house | Renovating a house | Reading material | Translations
Renovating our house in France
May 2009

Ernest lets us use his workshop to plane down some planks that we'll use to make doors for our wardrobe.
Renovating and creating our new bedroom
At last we had the energy and time to attack the second bedroom. It was originally used as a grain store on the first floor and was later divided into two to provide a small bedroom for one of the previous occupants. It served us as a guest bedroom but was less than satisfactory. Having already built the bathroom, it was time to give it a bedroom to 'en suite'. We knew it would be a mammoth task, since we had to demolish the stud walls and lowered ceiling and then put in a new floor, walls and ceiling. New electrics had to be placed in the walls and floor, plus the plumbing for the radiator.

Sealing off the dining room from the dust and carnage above

Let the fun begin

The old false ceiling had a thick layer of rat droppings
which Perry managed to get into his mouth, hair and clothing during the demolition, Waaaaah!

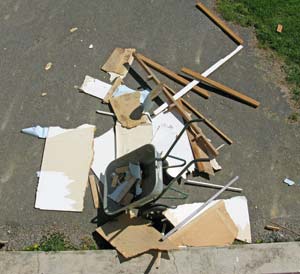
Dumping the old material out the window was the quickest and cleanest way out.

The old earth walls were crumbling and not one was straight.
We decided on a stud wall which would also help insulate the room.

Caroline was in the thick of it, chipping, sanding and removing the
woodworm-chewed softer wood on the beams.

Chipping off the old cement and plaster, we discovered that the old chimney was made of 'tomette' tiles, so decided to make a feature of it.

Our friend Jonathan couldn't have timed his visit better. Getting the plasterboards up the stairs was a back-breaking task.

With the plasterboard on the walls, we could place the hanging system for the ceiling

The 5.30 metre metal ceiling rails had to come in through the window.
The beams slanted from one end to the other, with a difference of 24 cm in height, so we had to lay the ceiling at a slight angle to compensate

The chiselled beams needed a smooth filler before we could paint them.
Caroline was head of filling and sanding.

Taking a breather from the dust.

Klaus came over and drilled two ventilation holes in the chimney. The idea being that the heat coming up from the wood burner will take the chill off the room in the winter. There will of course be a radiator anyway, but why not use existing heat where we can?

Caroline filling the gaps between the old beams with papier maché, made from old newspapers we found under the linoleum.

The ceiling was jointed and sanded. Perry was white from head to foot; then we painted it with three coats. The beams followed, using a subtle blue grey. Here, Caroline is putting on the undercoat in her full anti-spatter gear.

The new plasterboards were rather flat and straight for our house, so we asked Jorg to add some old fashioned lumps and bumps.

Jorg works on the chimney while the walls dry out.

Jorg created a small plynth in front of the chimney to hide the old, ugly stones at the bottom. He then covered Perry's plasterwork with a top coat of tinted 'chaux'.

The finished chimney. The 'chaux' is still wet in this picture and will dry out lighter. We're very happy with the result.

Next, the floor. Jorg had his work cut out to create a level floor when you see how uneven it is now. He had to set it level across the first half and let it slowly drop off a couple of centimetres towards the bathroom. Precision work that he just thrives on. Thankfully!

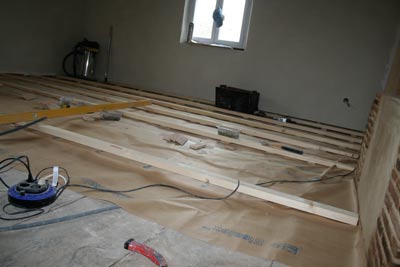
We used all natural products for the floor and insulation. Craft paper was placed as a dust membrane.

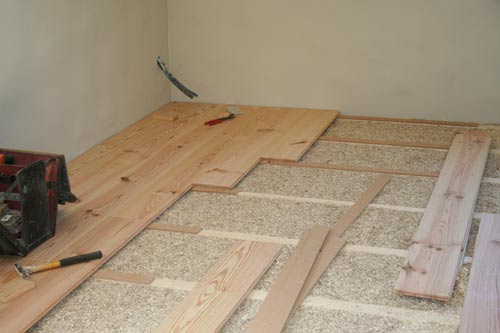
With the battens in place, the 'chanvre' (that's hemp or hennep to us Brits and Dutchies) was poured in between. It works as a sound and heat insulator.

Then the parquet. This is 19,5 cm wide and placed on top of compressed fibre and away from the wall so that no wood touches wood and transmit sound. The planks will be worked vigourously with a wire brush and then painted with a very pale and thin paint. The brushing brings out the grain through the paint.
Right, that's it for now. The wardrobe and shelving are next. We can't wait to move in!
A bientôt.
Our house archive
2005
March | April | June | August | October
2006
January | March | May | July | September | December
2007
April | August | December
2008
March | October
©2009 Perry Taylor & La Baguette Magique
